
Remodeling a shower the traditional way means coordinating a tile setter, a plumber, a glass guy, and a waterproofing system — then hoping they all show up in the right order. A shower kit skips most of that. One box (or a few boxes) with everything designed to fit together: base, walls, door, drain, hardware. Done.
Are kits as fancy as a custom-tiled shower? No. But they’re faster, cheaper, and far more predictable — and for a lot of bathrooms, that’s exactly the right trade. This guide covers what a shower kit includes, the types available, how kits compare to custom builds, and how to choose the right one for your space.
What Does a Shower Kit Include?
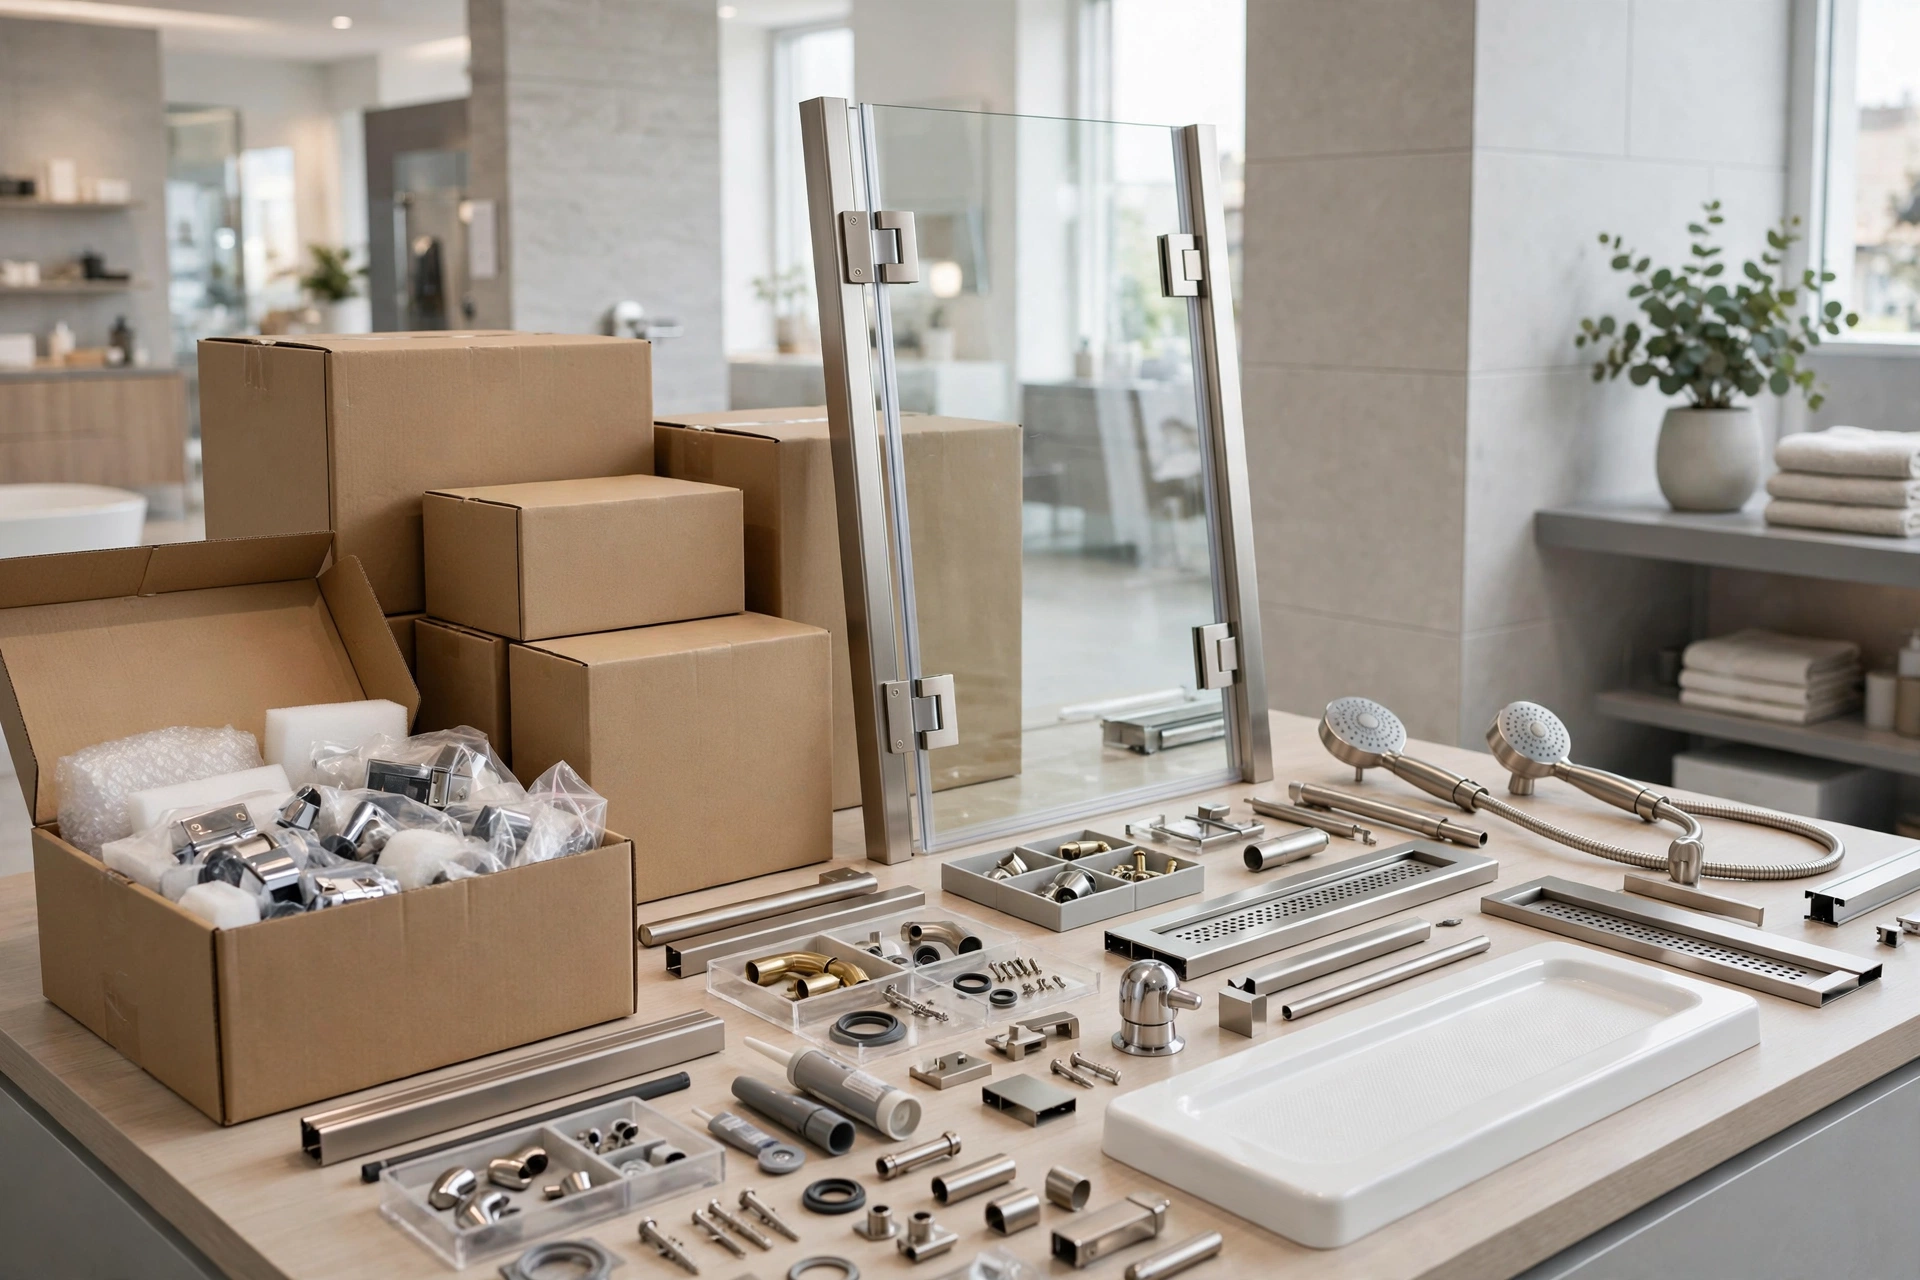
A complete shower kit is a matched set of components engineered to work together. The exact contents vary by brand, but a true all-in-one kit typically includes:
- Shower base (pan): the floor of the shower, pre-sloped toward the drain. Usually acrylic, fiberglass, or solid surface.
- Wall panels or surround: waterproof walls that fit the base exactly — no measuring tile layouts, no grout.
- Shower door or enclosure: glass door(s), sometimes framed, sometimes frameless, sized to the kit.
- Drain assembly: matched to the base, so there’s no guessing about compatibility.
- Hardware and trim: handles, seals, thresholds, fasteners — the fiddly bits you’d otherwise buy separately.
The magic word here is matched. Every piece is designed for the others, which eliminates the most common DIY shower disaster: parts that almost fit.
Types of Shower Kits
Alcove Shower Kits
The most common type. An alcove kit fits into a three-walled recess — the standard shower nook in most bathrooms. Three walls, one open side for the door. If your bathroom already has a shower alcove, this is the straightforward replacement.
Best for: standard bathroom remodels, replacing an old tub-shower combo. Sizes: the classics are 36×36, 48×32, and 60×30 inches.
Corner Shower Kits
Designed to tuck into a corner with two walls meeting at 90 degrees (or a neo-angle cut). The kit includes a corner base — square, neo-angle, or rounded — plus matching walls and a door that fits the angled front.
Best for: smaller bathrooms where every square foot counts. A corner kit turns dead corner space into a full shower without eating the room.
Tile-Ready (Tileable) Shower Kits
Here’s the hybrid option: a tileable shower kit gives you the engineered waterproof base and drain system of a kit, but the walls are designed to be tiled over. You get the foolproof waterproofing of a manufactured pan with the custom look of real tile.
Best for: people who want tile’s looks without tile’s riskiest part (the waterproofed pan). Honest note: you still need a competent tile setter for the walls — this isn’t a shortcut past tile labor, just past waterproofing anxiety.
Shower Kits vs Custom Build: An Honest Comparison
Kits win on: cost (often half the price of custom), speed (a weekend vs. two to three weeks), predictability (everything fits — that’s the whole point), and DIY-friendliness. No specialized waterproofing skills needed for most kits.
Custom builds win on: sizing (any dimension, any shape), design freedom (niche shelves exactly where you want them, any tile on earth), and resale perception. A beautifully tiled walk-in still photographs better than any kit.
The factor nobody talks about: labor availability. Finding a good tile setter right now can take months in many markets, and quotes are brutal. A kit you can install yourself (or with a handyman) sidesteps the contractor lottery entirely.
My honest take: for a guest bath, basement, rental, or a bathroom where the shower just needs to be good and done — a quality kit is the smart money. Save the custom build for the master bath you’ll use for the next twenty years.
How to Choose: Measure Your Space First
This is the step people skip, and it’s the one that matters most. Before you look at a single product page:
- Measure the rough opening — width, depth, and height, wall to wall. Measure twice; kits don’t forgive a half-inch error the way tile does.
- Check your drain location. Most kit bases have a fixed drain position (center, left, or right). Moving a drain means opening the floor — expensive. Match the kit to your existing drain if you can.
- Check the door swing. That beautiful glass door needs room to open. In tight bathrooms, a sliding door kit beats a pivot door.
- Confirm the entry path. Can you actually get the base through the bathroom door and up the stairs? One-piece bases for larger showers are surprisingly bulky. Multi-piece kits exist for exactly this reason.
Standard sizes you’ll see: 32×32 (compact — the minimum I’d recommend), 36×36 (comfortable for most adults), 48×32 and 60×30 (roomy rectangles), 60×36 (generous). Bigger is nicer to shower in, but only if your bathroom can spare the footprint.
What Do Shower Kits Cost?
Rough ranges for the kit itself (before installation labor):
- Basic fiberglass/acrylic kits: $400–$900. Functional, light, everywhere. The rental-property workhorse.
- Mid-range acrylic kits with glass doors: $900–$2,000. Noticeably nicer finishes, better doors, thicker materials.
- Premium solid-surface kits: $2,000–$4,000+. Stone-like bases, seamless look, genuinely upscale.
- Tile-ready base systems: $500–$1,500 for the base/drain/waterproofing, plus tile and tile labor on top.
- Custom tiled shower (for comparison): $4,000–$12,000+ installed.
Installation: a handy homeowner can install many alcove kits in a weekend. Hiring it out typically adds $800–$2,000 depending on your market and how much plumbing or framing work is involved.
Installation Overview
A typical shower stall kit install goes: remove the old shower (the messy part) → check and repair the framing and subfloor → set and level the base → connect the drain → install wall panels per the manufacturer’s sequence → seal everything with silicone → hang the door → caulk, test, done.
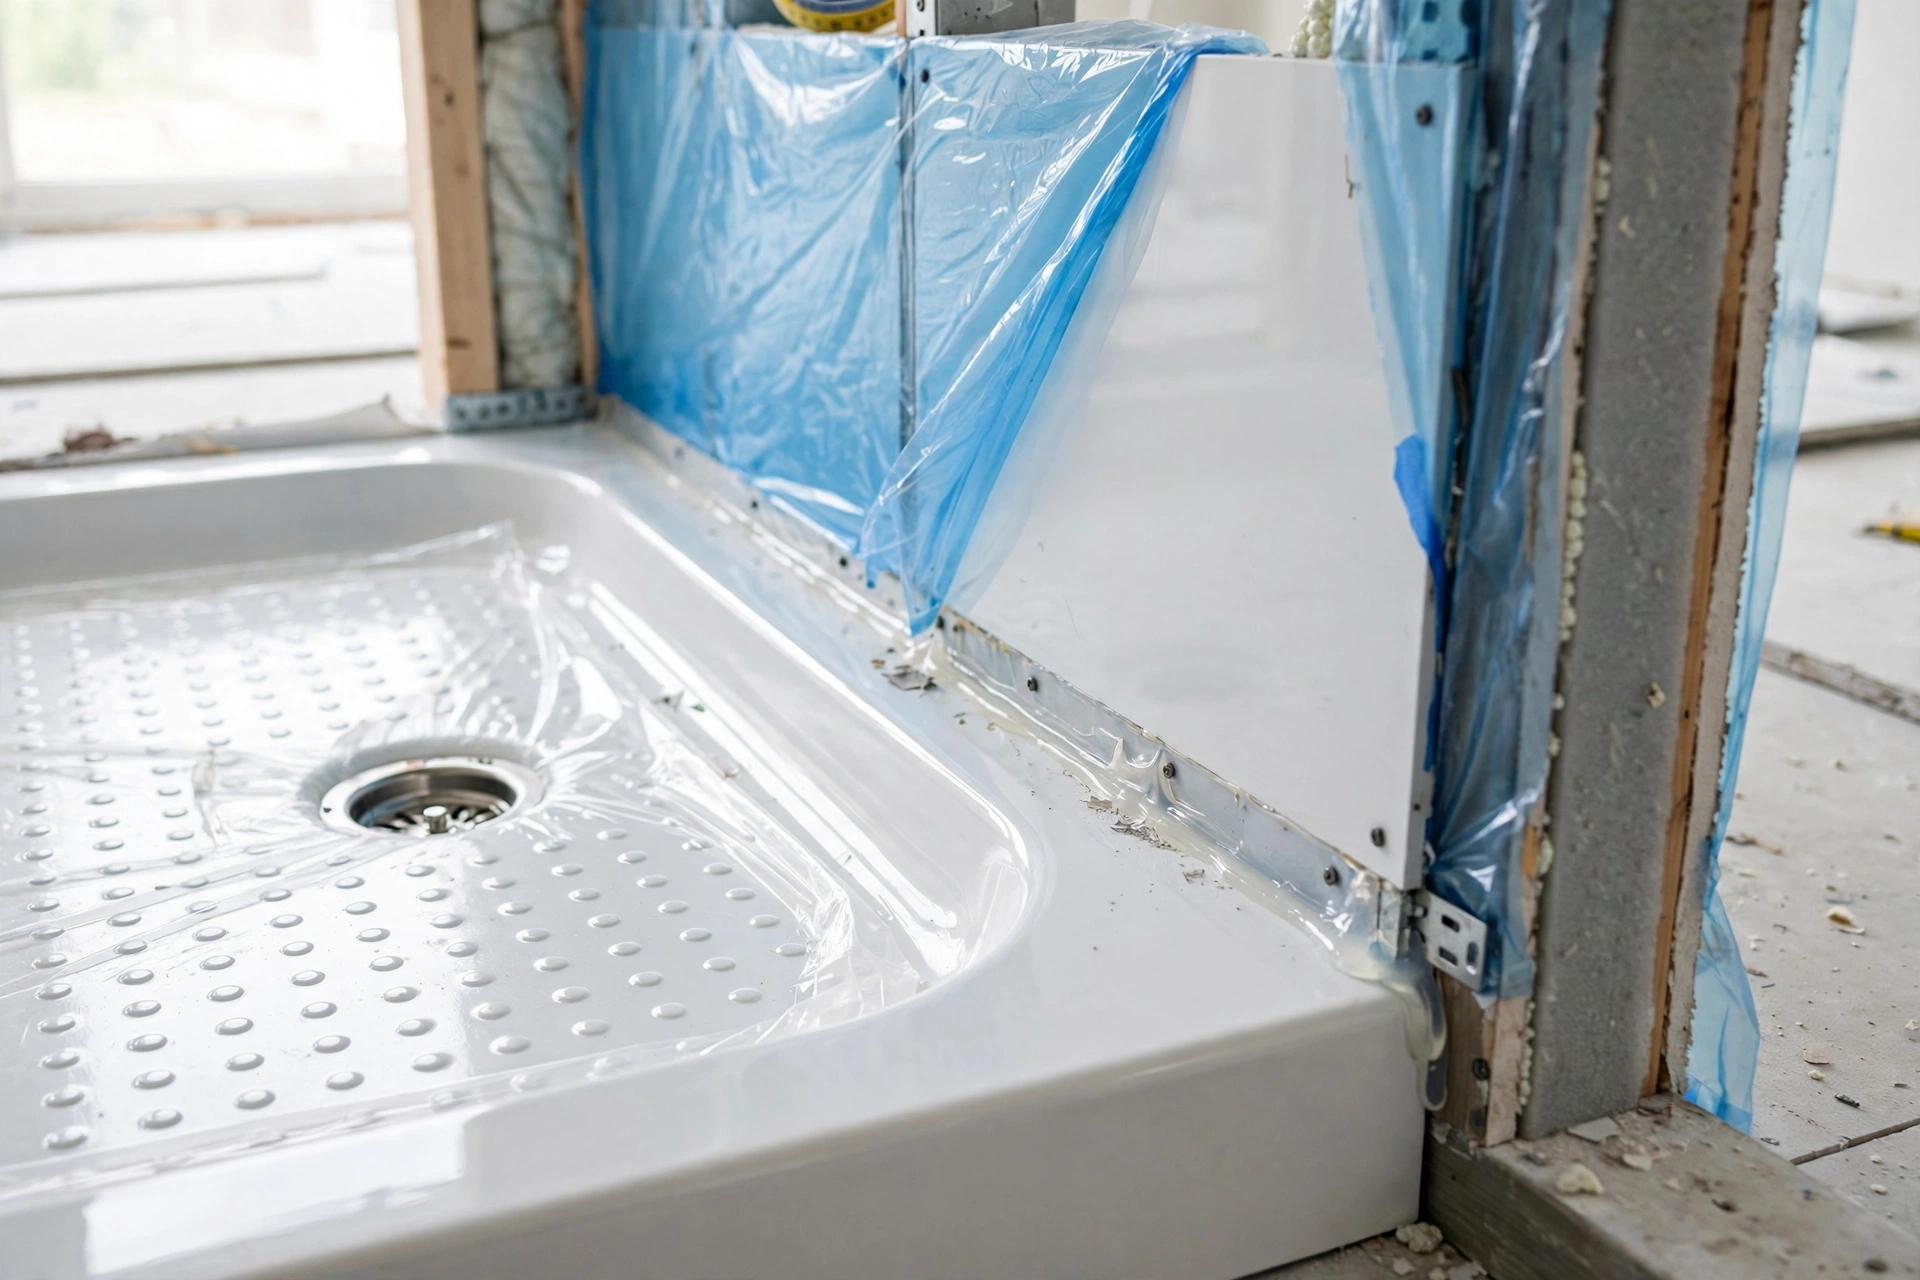
The three things that trip people up: an unlevel base (shim it properly — a rocking base will crack), drain alignment (dry-fit before you commit to adhesive or mortar), and rushing the silicone (let it cure fully before the first shower; 24 hours is the standard).
When to call a pro: if the subfloor is rotted, if the drain needs relocating, or if the plumbing rough-in doesn’t match the kit. The kit itself is DIY-friendly; the stuff underneath it sometimes isn’t.
Related: Shower Pan Guide — a deeper look at base materials, sizing, and what makes a pan last.
Best-For Scenarios
Rentals and investment properties: Kits are the obvious choice — durable, cheap to replace, and tenants can’t grout-fail a surround that has no grout.
Basements: Concrete floors, limited headroom, moisture concerns — a kit’s inherent waterproofing handles basement realities better than site-built tile.
Quick remodels: Selling the house next spring? A kit refreshes a dated bathroom in days for a fraction of a custom job, and buyers respond to “new shower” regardless of how it was built.
Aging in place: Low-threshold kit bases (some as low as 2–3 inches) make entry dramatically easier than a standard tub. Pair with grab bars and a handheld shower and you’ve future-proofed the bathroom.
Related: Walk-In Shower Guide — if you’re considering a curbless or low-threshold setup, start here for layout ideas and cost expectations.
What About the Walls?
Most kits include their own wall panels, but if you’re going the tile-ready route — or replacing just the surround on an existing base — the wall choice deserves its own research. Panels and tile each have real trade-offs in cost, maintenance, and looks.
Related: Shower Wall Panels Guide — the full breakdown of acrylic, PVC, fiberglass, and solid-surface options.
Frequently Asked Questions
Are shower kits any good, or do they look cheap?
Cheap ones look cheap. But mid-range and premium kits — especially solid-surface — look genuinely good. The “kit look” reputation comes from 1990s fiberglass; the category has moved on.
Can I install a shower kit myself?
Most alcove and corner shower stall kits are designed for DIY installation with basic tools. The exceptions: if plumbing needs rerouting, if the subfloor needs repair, or if it’s a large one-piece unit that’s hard to maneuver. Know your limits.
Do shower kits complete with base, walls and door include the faucet?
Usually not. Kits cover the enclosure — base, walls, door, drain. Plumbing fixtures like the valve, trim, and shower head are almost always sold separately, so budget for them on top of the kit price.
How long does a shower kit last?
Acrylic and solid-surface kits: 15–25 years with normal care. Fiberglass: 10–20, though the finish tends to age visibly. The drain and seals may need attention sooner — check caulk lines yearly.
Can I put a shower kit over my existing tile?
Generally no — kits need to anchor to studs and a proper subfloor, and the base needs a level surface. Over-tiling is a wall-panel trick, not a kit trick. The old shower usually has to come out.
The Bottom Line
Shower kits complete with base, walls, and door take the most stressful variables out of a bathroom remodel and replace them with a weekend project and a predictable bill. Match the kit to your measurements and your drain, don’t cheap out on the base material, and let the silicone cure. It’s not the fanciest shower you’ll ever see — it’s the one that’s actually finished.